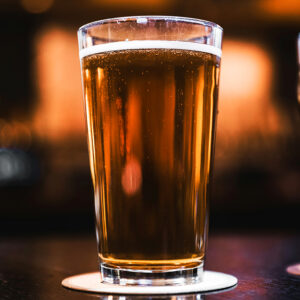
In today’s video I attempt to make a thousand year old drink in under 5 minutes. I fail. It took 11.
Want to know how to make a Cyser? Not sure what a Cyser is?
Well, there’s mead, you know, Vikings, Egyptians, and pretty much all of our ancestors loved this stuff. It’s a fermented alcoholic beverage made from honey. Well, honey, water and yeast, if we’re being technical. It is possibly the first fermented beverage humans ever made. They made it so long ago that the word “yeast” and “bacteria” weren’t even a thing yet.
Essentially, what our forebears did was put a bunch of honey in a large open tub and dilute it with water. I can imagine that the first mead was made by accident when someone stored honey in an open container and someone else accidentally poured water in it. I’m sure it was like the Reese’s Peanut Butter Cup commercials, “You got water in my honey!”, “You got honey in my water!”. Then they for whatever reason did nothing about it, and tried drinking it a month later. It likely didn’t taste very good, but they felt better, probably all warm and fuzzy and the cares of the ancient world faded away into mere glimpses of memory. So, they did it again. Yep, probably something like that.
Oh, I forgot my favorite part. They had stirring sticks, well the Vikings did, called “Totem Sticks”. These were passed down from generation to generation and considered magical. In part, they were right, they are magical, in that they held some of the yeast from previous batches and essentially inoculated the next batch. You see, yeast is in the air, on fruit, and in general, everywhere. In ye olden times, wild yeasts like that were captured or fell into the must (that’s the name for honey and water mixed to make mead) and fermented it into what we call mead.
People had no idea yeasts existed, so to them, when they stirred it with this particular stick, fermentation happened more quickly, thus… magic stick. Today we understand a lot more about these things and in general will add yeast on purpose to start a fermentation, but, many people still do lambic or wild yeast fermentations with great success.
Today, we’re sticking to a more simple formula that leaves a lot less to chance.
Things you will need to make my Super Simple Cyser (I should Trademark that)
- A fermentation vessel. This can be glass or plastic (food grade) and should be sanitized. I’ll have links to some of these later in the article. I’m making a gallon today, so scale up or down, depending on how much you are making.
- Sanitizer. You want to kill off all the bacteria before you add bacteria back in. This will make more sense as we go on.
- An Airlock and bung (I can hear the Beavis and Butthead jokes now). This keeps bugs and other unwanted things out of your brew. It’s like $3, just get one.
- Honey. It’s important to get as fresh and good a honey as you can. I get raw wildflower honey from a local source. It’s about $12 for 2 pounds. And you will need 2 pounds for this recipe. If you put the bottle in a pan of hot water for about 15 minutes, it loosens up the honey and lets it pour better.
- Apple juice or cider. In the US, we call cloudy juice “cider”, but everywhere else in the world, cider is what we call hard cider. For ease of communication, I’ll call it apple juice. Get one that has as few ingredients as possible, preferably just one, “apple juice”. Avoid anything you can’t pronounce or words like sorbate. They’re probably preservatives and will kill your yeast, since that’s why they are in there, to kill bacteria. So yes, it’s possible that bottle of juice with preservatives in it carries the dead carcasses of thousands of bacteria. Lovely thought, huh? And people drink that stuff. You can use fresh pressed juice if you like, but you should pasteurize it to make sure no wild beasties are in there. Bring to 180 degrees Farenheit for about 15 minutes and let cool. If you don’t let it cool to room temperature, you WILL kill your purposely added yeast and be left with honey-sweetened apple juice, which is nice, but not cyser.
- A funnel. While not truly necessary, it does make pouring the liquids easier.
- A Hydrometer and measuring tube. Again, optional, but I like being the Mad Scientist and knowing how much alcohol I am actually making.
- Yeast. You can use just about any yeast for this, but I don’t really recommend bread yeast. Yes, I have done it, and yes, it worked, and yes, I will spare you the trouble of trying it yourself, because yes, other yeasts do it better. Also, you can get 2 packages of the yeast I used, Danstar Belle Saison, which is enough to make 10 batches of this recipe for about $9. That’s cheaper than the airlock.
- A cup of some kind, large enough to hold a bit of juice, maybe a cup or so.
- Yeast Nutrient. Again, not purely necessary, but I’ve recently started adding it to my brews and for mead, which tends to be higher gravity (more on that later) and thus higher concentrations of sugars which make it harder for yeasts to “start”, I think it helps. Can you do this without it? Absolutely, it just might take a little longer to start fermenting.
- A place to store your fermenter once it’s full that will be about 70 degrees F and relatively dark. Bright sun is sort of the bane of any bacteria so… yeah, we need the yeast to live long enough to burp and fart out the CO2 and alcohol for our cyser. Yes, you read that right. It’s what they do.
Again, scroll to the bottom of this post and I’ll put links to all of these items on Amazon. If you decide to purchase them, please do so using our links. There is absolutely no extra cost to you, but we do receive a small commission from Amazon and that helps support City Steading and keeps articles and videos like this coming.
And so it begins!
Yes, do these in order. First it needs to be that way, second, it makes more sense.
- First, sanitize everything. I fill up the sink with hot water and add the sanitizer. You could just use a big tub or bucket too, just make sure everything you’re going to use soaks in that for at least a minute or two.
- Grab that cup we said to get, pour a little juice into it, maybe 8 ounces, that’s a cup if you didn’t know. Add a half teaspoon of the yeast to this. What you’re doing is hydrating the yeast. Now, if you happen to be using liquid yeast or a starter? You can skip this step. Most likely you’re not using those things. Some people call this juice/yeast mixture a starter, they would be incorrect. Starters are more involved. Liquid yeasts are more expensive, and many experienced brewers use them, and so if you are, I’d image you know all I am about to say here, so I doubt you’d still be reading, and thus, I don’t think you’re using liquid yeast.
- Pour all of the honey into the fermentation vessel. I like 1 gallon glass carboys for vessels, but you can use pretty much any food grade plastic bottle too. There are some that would just pour off say… 1/4 of the apple juice from the bottle it came in, and add the honey right to that. I’m not one of those people, but the theory is sound. The bottle and its contents are sanitized, so, in theory, you can just use that as a fermenter. It can work, but I don’t really like plastic, so I don’t do it this way. Also, it’s much more difficult to add an airlock to those bottles.
- I highly doubt you will get all the honey out of the bottle by pouring. That, or I personally wouldn’t spend three hours standing there holding the bottle for every last drop to come out. Use this trick, pour some apple juice into the bottle, shake it up, and voila! you should get most of the honey out that way. Might take a time or three to get it all. Honey is the most expensive part of this recipe so… get every drop you can.
- Add the juice. Try to leave some headroom, at least as much as you poured into the cup with the yeast in it, and enough room for about 2 inches from the top of the bottle. More is better than less here, since… it will expand, there could be Krausen (fancy name for foam) and if there is nowhere to go, it WILL go up into your airlock and out into whatever space you happen to be storing your brew in. Trust me, it’s sticky, will ruin shoes, and possibly your day, as you clean it up.
- Shake the crap out of it. But first, put that bung in the top. You need to completely dissolve that honey into the juice. Don’t skimp on the mixing here. Sure, you can use a long stick or a spoon (if you sanitize them first) but for 1 gallon batches, it’s easier to just pick it up and shake the heck out of it for about 5-10 minutes or until nothing settles on the bottom of the fermenter.
- At this point, if you want to know, you would take the gravity reading, specifically the “Original Specific Gravity Reading”. If you want to know how much alcohol you made and/or when fermentation has stopped, you need to do this. You can wing it, but you will always wonder in the back of your mind… “Is it secret? It is safe?”. To take this reading:
Pour off enough liquid to almost fill your measuring tube. Stick the hydrometer in there. You did sanitize those things, right? Read the marking on your hydrometer. There might be up to 3 scales on it, so you’re looking for one that says Specific Gravity. The number you see should be somewhere around 1.090 or so, depending on your juice and your honey. For those that like to know things…. Water is 1.000, sugar makes water more dense or have a higher specific gravity so the more sugars there are, the higher your reading will be. As the yeasts eat the sugars, the number will drop again since there is alcohol in the mix now, and less sugar. Alcohol is less dense than water by the way. When the reading stops dropping for a few days, fermentation is done. Normally, “Final Gravity Readings” are in the 1.010 range or so. They can actually go below 1.000 due to alcohol being less dense than water, and so, the reading can drop to .990 but that would be a very dry beverage. In fact, the terms dry and sweet actually refer to how much sugar is left in the fermentation. Now you know this, you can impress people at parties. Don’t tell them I told you, own it, use it. This is now your information.
- Pour in the yeast/juice hydration mix. Mix it up first so you get it all in. Then add the yeast nutrient, usually a teaspoon per gallon.
- Fill your airlock to the MAX mark with sanitizer water and put the bung and airlock in place on your fermenter.
And… done! Almost.
Put the fermenter in a dark place with a relatively consistent temperature of around 70 degrees farenheit. Let it sit there for about 2 weeks. Check on it after a day or two, and you should see bubbles coming up from the airlock. If not, don’t worry, give it another two days. If you still see nothing, add a pinch of yeast.
I’ll post a followup to this article once it’s time to rack and bottle the cyser.
And now… the moment you’ve all been waiting for, the links to all the things.


